How To Make Work Categories
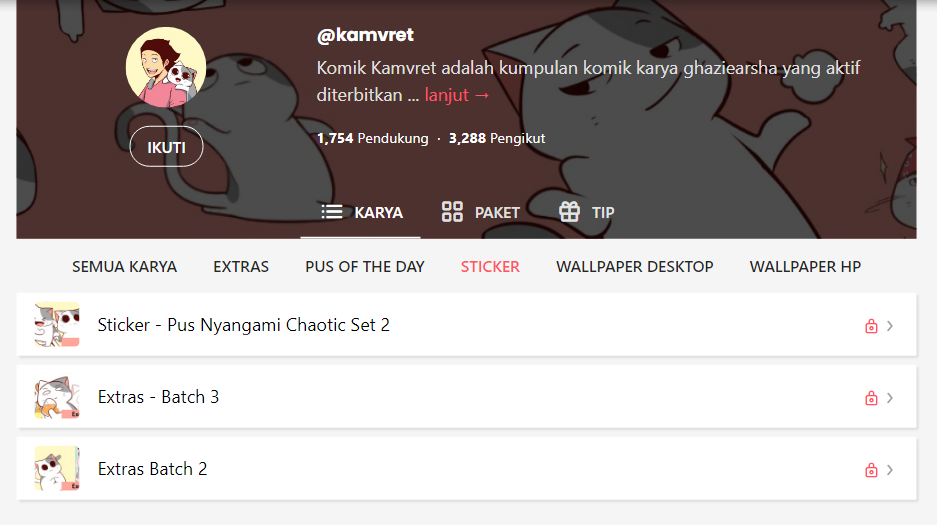
The work category is a menu creation feature on the creator's main page. The menu can be filled with various work posts. For example, you can see the screenshot from the Komik Kamvret account below.

ALL WORKS, EXTRAS, PUSH OF THE DAY, STICKERS, DESKTOP WALLPAPERS, and HP WALLPAPERS are examples of "Works Categories".

The function of this feature is to make it easier for supporters to find works, especially if the creator who wants to be supported has more than one title or one type of work. The creator can determine the name of the work category themselves according to their needs.
How to set Work Categories
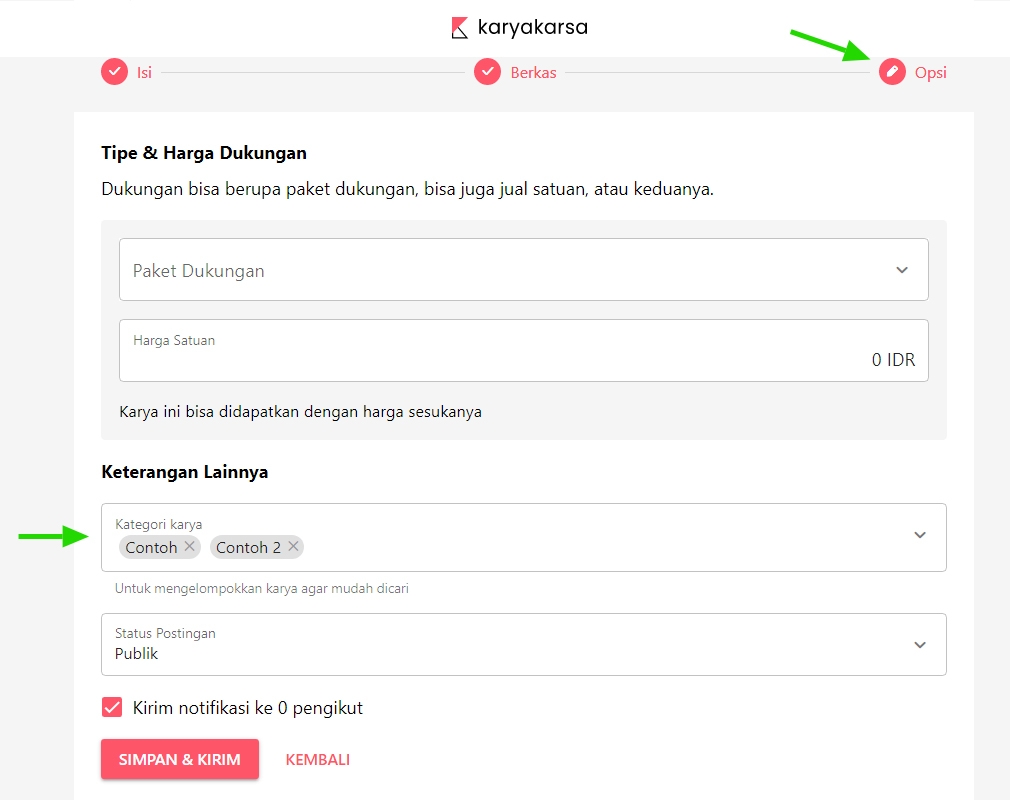
How to create a work category is not difficult and can be done at the same time as uploading the work. First, enter the dashboard page, namely by pressing the 🎨 symbol on the menu at the bottom of the screen, then select the "WORK" menu. After that, you can continue to upload the title, teaser, and synopsis in the "Content" menu, then upload the work in the "File" menu. After that, go to the "Options" section. You can set the work category on this page, precisely in the column indicated by the green arrow in the image below.

There are two ways to set the work category
If you are using a laptop or PC, just type the name of the category of work you want, then press enter until the text turns gray, as in the example image above.
If you are using a mobile phone, you type the name of the category of work you want, then press 1x space followed by enter until the text turns gray, as in the example image above. On some mobile phones the enter button can be an arrow logo or some use a magnifying glass logo.
The category of the work that has been saved will automatically continue to be a choice in the column. So, in the next work you don't need to retype it in because it has been saved. Just one click, and it's done!
Last updated

